Linking boxes
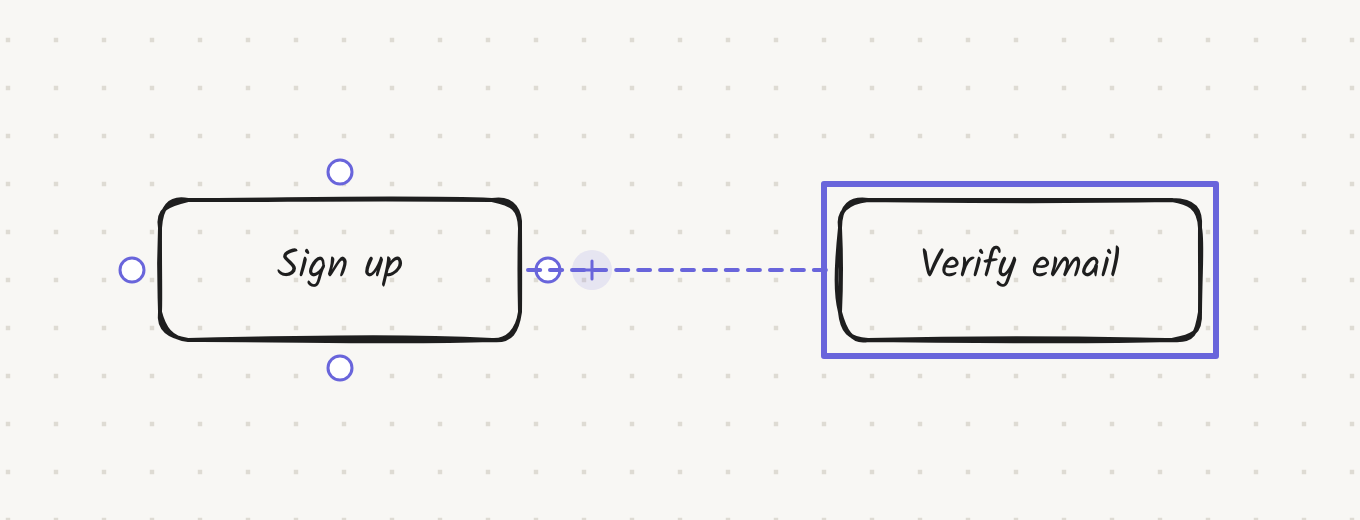
Links connect boxes directly, the way they do in Miro. When you move a box, its links follow and re-route around other boxes.
Ways to link two boxes
| Method | How |
|---|---|
| Drag a dot | Hover a box. Drag one of the dots on its sides and drop it anywhere on the other box: the whole box is the target, so there's no aiming |
| Select and press L | Select two or more boxes and press L to link them in the order you selected them. ⇧L links every selected box to the first one |
| Link mode | Press K, then tap boxes one after another to chain them. Tap empty space to start a new chain |
| Drag, hold and drop | Drag a box over another, hold for a moment until a ring appears, and let go. The box returns to where it was and the two are linked |
| Draw an arrow | With the Arrow (A) or Line tool, draw from one box to another. It becomes a link |
| Type it | In a label, type -> Name at the end of a line, or @Name anywhere, to link to the box with that label |
You can't link a box to itself, or add the same link twice.
Typing
-> Nameor@Namematches labels without caring about case: an exact match first, then the first label that starts with the name. The-> Nametext is removed from the label;@Nameis replaced with the target's label.
Adding the next box, already linked
| Method | Result |
|---|---|
| Tab | With one box selected, adds a linked box next to it. Tab while typing a label finishes the label and does the same. If suggestions are showing, Tab accepts them instead |
| Click a plus | Hover a box and click the + on any side |
| Click a dot | Clicking (rather than dragging) a dot adds a box on that side |
| Drop a dot on empty space | Opens a menu: pick a shape, Same shape, or one of Smart Assist's suggestions. Use ↑ ↓ and Enter, or press 1–9 |
| ⌘↵ | Adds a sibling: another box linked from the same parent. A box with no parent gets an unlinked neighbour |
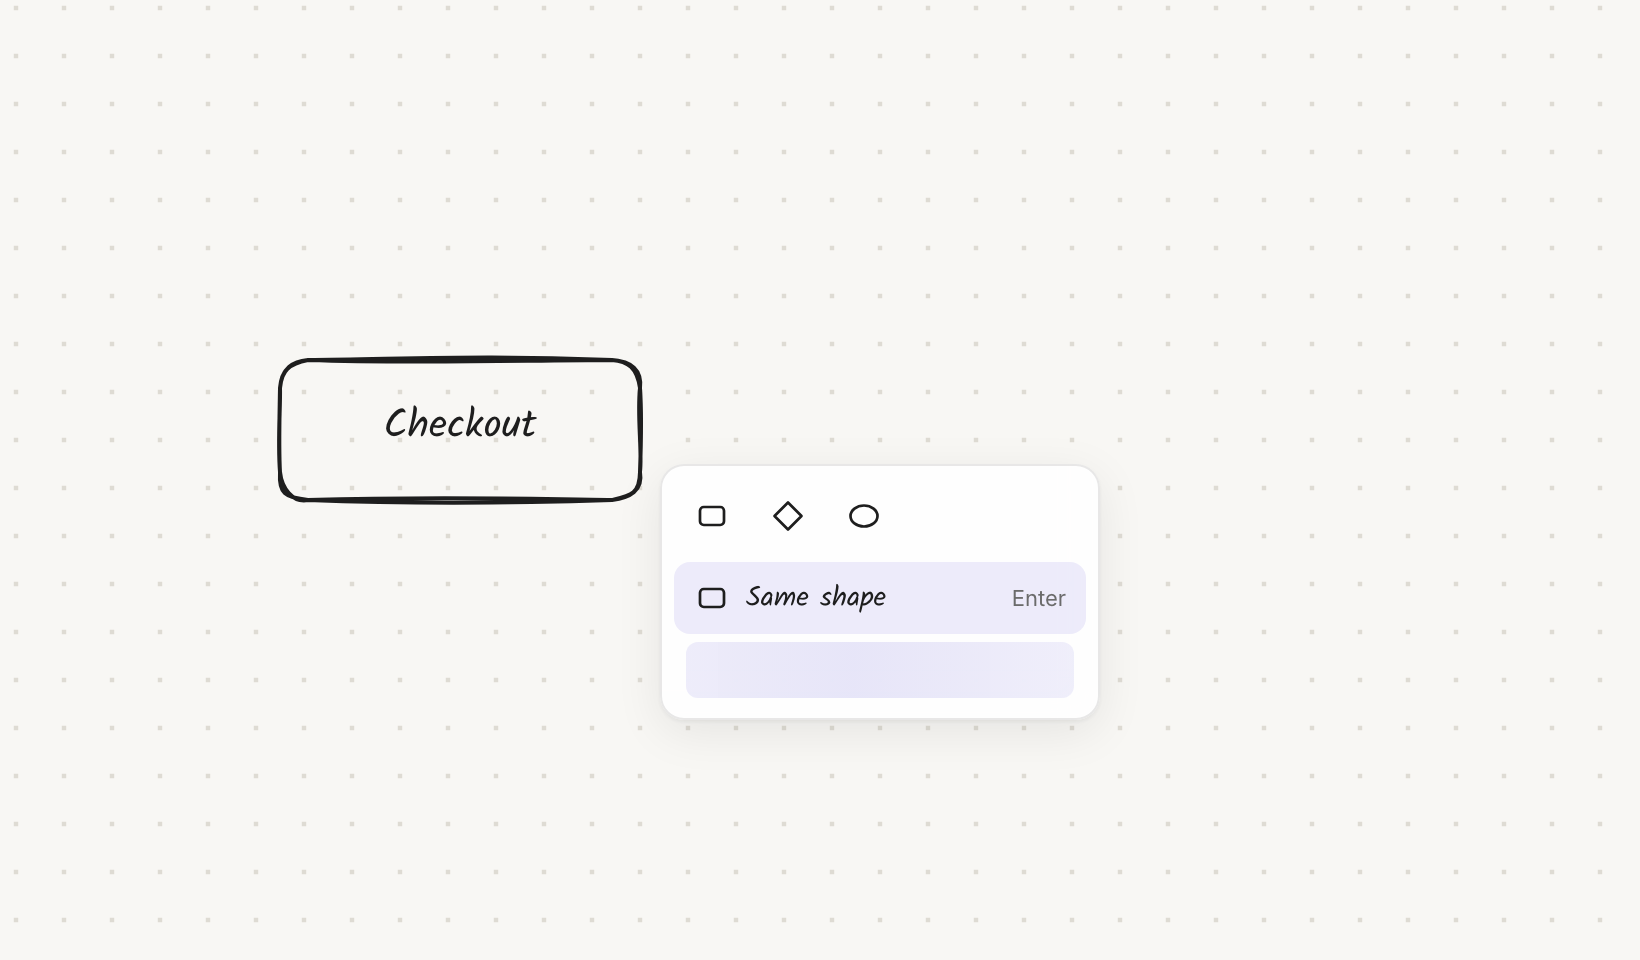
New boxes copy the style of the box they came from. Kelvo finds a free spot in the direction your flow is already going, and scrolls so the new box is in view.
Editing a link
Click a link to select it. The selection bar shows the link options.

| Option | Choices |
|---|---|
| Route | Elbow, Straight, Curved. New links are elbow, which steps around boxes in the way; pick another for every new link in board menu → Preferences → Links |
| Arrowheads | At the end, at both ends, none |
| Reverse | Swap which end the arrow points to |
| Label | Edit the label, or select the link and press Enter |
| Colour | The six stroke colours |
| Unlink | Delete the link |
To move a link to a different box, select the link and drag one of its ends onto the new box.
Bending a link
A selected link has a handle in its middle. Drag it to bend the link into a curve through that point. A straight or elbow link becomes curved when you do this. The bend is kept relative to the two boxes, so it keeps its shape when you move them.
To undo a bend, drag the handle back onto the link's automatic curve, or click Curved in the selection bar.
Free arrows and lines
An arrow or line drawn on empty space can bend the same way: select it and drag the handle in its middle. Its arrowheads follow the curve. Drag the handle back onto the straight line between the ends to straighten it.
Moving through a flow
- ⌥ + arrow key moves the selection to the linked box in that direction.
- In the command palette, Select downstream, Select upstream and Select connected select part of a flow or all of it.
- Alt+drag a box to move it together with everything downstream of it.
Deleting without breaking the flow
⇧⌫ (Shift+Delete) deletes the selected boxes and reconnects them: each box that pointed into a deleted box is linked to each box it pointed to.